
I've been making fruit wine at home for years — and as a chemical engineer, I've always been drawn to the science behind fermentation. What keeps me coming back isn't the chemistry, though. It's the fact that a pile of fruit, a bag of sugar, and a packet of yeast can produce something genuinely worth sharing. Fruit wine is one of the most accessible and rewarding projects in home fermentation, and I've designed this hub to make it as approachable as possible.
Through our community of more than 9,000 home winemakers, I've answered thousands of questions from first-timers and experienced makers alike. The problems that trip people up — stuck ferments, wines that won't clear, batches that taste thin or sharp — almost always trace back to a handful of fixable mistakes early in the process. This guide is built to head those off before they happen.
Below you'll find a quick fruit picker, a universal fermentation template, hands-on advice for yeast and nutrient selection, a full equipment overview, fermentation management guidance, and a troubleshooting reference. Bookmark this page — every individual recipe on MakeWineLab links back here as your basecamp.
How to use this hub: Pick a fruit from the sections below or jump straight to Browse by Category. Open the recipe and follow the step-by-step method. When technique questions come up — stuck ferments, haze, flavour problems — the Fermentation Management, Sanitation, and Troubleshooting sections on this page have the answers. The guide to common winemaking problems goes deeper on recovery scenarios.
Quick Picker: Which Fruit Should You Make Next?
- Beginner‑friendly & fast aging: Strawberry, Blueberry—clean flavours, forgiving ferments.
- Bright & floral: Dandelion, Hibiscus—lifted aromas and crisp finishes.
- Tropical & aromatic: Mango, Banana, Pineapple—watch nutrients and temperature.
- Classic orchard profile: Apple, Plum (Umeshu style), Peach—balanced acidity and easy drinking.
- Summer crowd‑pleasers: Watermelon and mixed berries—serve chilled.
- For tinkerers (acidity/tannin tweaks): Pomegranate, Gooseberry—structure and zip.
Editor's Picks: 10 Can't‑Miss Fruit Wines
- Strawberry Wine — Juicy, crowd‑pleasing, and clears relatively fast. Great first project.
- Blueberry Wine — Deep colour, blueberry compote aromatics; ages beautifully with a touch of oak.
- Apple Wine — Crisp, off‑dry styles shine; keep SO₂ in check to preserve freshness.
- Japanese Plum (Umeshu) — Honeyed stone‑fruit notes; try different sugars (rock sugar/honey) for nuance.
- Dandelion Wine — Floral and nostalgic; meticulous sanitation and gentle racking are rewarded.
- Mango Wine — Lush tropical aroma; nutrients and temperature control are essential.
- Peach Wine — Delicate ester profile; avoid oxidation, consider antioxidant additions at rackings.
- Watermelon Wine — Refreshing summer sipper; backsweeten slightly post‑stabilisation for balance.
- Hibiscus Wine — Vivid colour and tart lift; combine with berries for complexity.
- Pomegranate Wine — Ruby colour, bright acidity; gentle tannin helps structure.
Universal Fruit Wine Template (1 US Gallon / ~4–5 L)
Use this baseline then adapt per recipe:
- Fruit: 1.5–2.5 kg, crushed or juiced; pectic enzyme helps extraction and clearing.
- Sugar: target OG ~1.085–1.095 for ~11–13% ABV. Measure with a hydrometer.
- Acid: aim pH ~3.2–3.6; adjust with acid blend or citrus. Taste is your compass.
- Tannin: 0.25–0.5 tsp for low‑tannin fruits; tea tinctures can be a gentle alternative.
- Yeast nutrients: Follow label; staggered nutrient additions prevent sluggish ferments.
- Yeast: Clean workhorse (EC‑1118) or fruit‑forward strains if aroma is priority.
Process: Meticulous sanitation → primary 5–10 days with daily cap management → rack to carboy → secondary several weeks → stabilise → bottle → age 3–6 months (tannic fruits often longer).
Sugar, Acid & Tannin: Getting the Balance Right
Sugar: Calibrate with a hydrometer. If OG is low, dissolve extra sugar in a small portion of the must and add it back gradually — step-feeding avoids the osmotic stress that stalls yeast. If OG is too high, dilute with treated water. Most fruit wines perform well at OG 1.085–1.095, giving a finished ABV of roughly 11–13%. Check again at each racking; an unexpected SG drop mid-secondary can signal a restart you didn't plan.
Acid: Fruit wines come alive with the right acidity. The target pH for most styles is 3.2–3.6. High-acid fruits like gooseberry and pomegranate can naturally fall below that range, while low-acid fruits like banana may need a boost. Use acid blend (tartaric, malic, and citric mix) as your default; for stone fruits, malic acid alone often gives a cleaner result. Always measure pH before and after adjustment. Post-fermentation acid additions are possible but more nuanced — taste is your final compass, aiming for zippy but not sharp.
Tannin: Adds grip and age-worthiness. Most fruit wines lack the natural tannin of grape wine, so small additions help structure without turning the wine astringent. Start at 0.25–0.5 tsp per gallon; oak cubes, grape tannin powder, or a tea tincture (5-minute steep, strain and add) are all workable. Over-tannin shows up as dry, puckering astringency — start conservative and scale up over subsequent batches rather than correcting downward later.
Matching Yeast to Fruit
- Berries (strawberry/blueberry/blackberry): Neutral yeasts keep fruit clean; estery strains (Lalvin 71B is a favourite) add a rounded, jammy note.
- Orchard (apple/pear/peach): Fresh-estery strains; limit oxygen and rack gently to protect delicate aromatics.
- Tropical (mango/banana/pineapple): Watch nutrients and temps — these fruits are high in fructose and low in natural nitrogen, which is where tropical batches most often go sideways. Staggered nutrient additions and tight temperature control (18–21 °C) make a big difference.
- High-acid (pomegranate/gooseberry): Yeasts with good acid tolerance; gentle tannin addition extends mid-palate length.
Whatever yeast you choose, temperature stability and oxygen management are the two levers that matter most for fermentation quality. Swings in temperature — even brief ones in the first 72 hours — are a common trigger for stalled ferments, particularly in tropical fruit wines.
Equipment & Setup
You don't need a professional setup to make great fruit wine, but you do need the right basics, properly sanitized. Here's what a complete 1-gallon and 5-gallon kit looks like.
Primary fermenter: A food-grade bucket with a lid and airlock port. For a 1-gallon batch, a 2-gallon bucket gives enough headroom during active fermentation. For 5 gallons, a 7.5–8-gallon bucket provides space for the fruit cap and foam without risk of overflow.
Secondary carboy: A glass or PET carboy for the secondary and clearing phase. Headspace matters here — a nearly full carboy dramatically reduces oxidation risk. A 1-gallon glass jug works perfectly for small batches; a 5-gallon glass or PET carboy for larger runs.
Airlock and stopper: A standard 3-piece airlock with a drilled rubber bung. Fill the airlock with water or dilute sanitizer solution. Check it after every transfer — a dry airlock is a direct oxygen pathway into your wine.
Hydrometer and test tube: Essential for tracking fermentation. Take an OG reading before pitching yeast, then check every 2–3 days during primary. Fermentation is complete when SG is stable over three consecutive days. ABV = (OG − FG) × 131.25. See How to Read a Hydrometer for a full walkthrough.
Siphon and racking cane: A rigid racking cane with flexible vinyl tubing allows clean, low-splash transfers. Autosiphons speed things up considerably for 5-gallon batches. Rinse the tubing with water immediately after use and sanitize before each use.
Sanitizer: No-rinse sanitizer is the most practical option for home winemakers. Follow the dilution instructions on the label and let equipment drip-dry rather than rinsing — the residual solution at working concentration is harmless and won't affect flavour.
Bottles, corks, and corker: Standard 750 mL wine bottles with #9 straight corks for wines you plan to age 6+ months. A floor corker is worth the investment for 5-gallon batches; a hand corker works for occasional 1-gallon runs.
Pectic enzyme: Add this during primary fermentation to break down pectin in the fruit pulp. It improves juice yield and speeds up clearing — particularly important for berries, stone fruits, and bananas, which are naturally high in pectin.
Fermentation Management
Primary (Days 1–10): Once you've pitched yeast, fermentation typically becomes visible within 24–48 hours — CO₂ bubbling through the airlock, foam on the surface, and a rising cap of fruit pulp if you fermented on the skins. Stir or punch the cap down daily to prevent surface mold and release trapped gas. Monitor SG every 2–3 days.
Temperature: Keep primary fermentation in the 18–22 °C (65–72 °F) range for most yeasts. Below 15 °C, fermentation slows dramatically or stalls. Above 27 °C, yeast produce fusel alcohols that give the wine a harsh, hot finish. In my experience, a brief temperature drop in the first 72 hours is the most common cause of stuck ferments in tropical fruit wines specifically — those musts tend to run lower in natural nutrients and are more sensitive to early stress.
Transfer to secondary: Rack to a clean carboy when SG drops to around 1.010–1.020 and vigorous bubbling has clearly slowed. Avoid waiting too long — extended contact with a heavy lees bed can produce off-flavors from yeast autolysis. Leave as little headspace as possible in the carboy.
Secondary (Weeks 2–8+): Fermentation continues at a quieter pace. Occasional slow bubbling is normal. Rack again if a heavy lees deposit forms within the first 3–4 weeks. A small potassium metabisulfite addition at this rack (¼ tsp per 5 gallons) protects against oxidation.
Signs of trouble: No SG movement for more than 72 hours, sulfur (rotten egg) smell, or unusual surface growth. Check the Troubleshooting section below, or the detailed guide to common winemaking problems for step-by-step recovery.
Stabilising & Backsweetening
When SG is stable and the wine is dry (typically FG 0.990–1.000), rack off the lees and stabilise before any backsweetening. Standard stabilisation: one Campden tablet per gallon (or ¼ tsp potassium metabisulfite per 5 gallons) plus ½ tsp potassium sorbate per gallon. Wait 24 hours before adding sweetener.
Start backsweetening conservatively — dissolve sugar in a small cup of the wine first, blend it back into the batch, then taste. Stop when the fruit character comes forward without turning the wine cloying. Most fruit wines land best slightly off-dry (FG 1.005–1.010 after sweetening), though this is entirely personal preference. Never sweeten before stabilising — active or dormant yeast will re-ferment the added sugar inside the bottle.
Aging & Storage
Most fruit wines are enjoyable after 3–6 months; some develop better character up to a year. Tannic fruits — blackberry, pomegranate, elderberry — reward the most patience. Store bottles cool and dark; a consistent 12–15 °C is ideal. If using natural corks, keep bottles horizontal. Log tasting notes for each batch so you can track improvement and refine future recipes.
Seasonality & Planning
Spring: dandelion, hibiscus. Summer: strawberry, blueberry, watermelon, mango. Autumn: apple, plum, pomegranate. Winter: spiced and mulled variations for gatherings.
Align your brewing calendar with local harvests for better price, freshness, and aroma.
Sanitation & Safety
Flawless sanitation is the single biggest factor in making consistently good wine. The majority of off-flavors — vinegary sharpness, mousy notes, medicinal aromas — trace back to incomplete cleaning or inadequate sanitation, not to the fruit or the recipe.
Clean first, then sanitize. These are two separate steps. Clean with warm water and a no-scent dish soap or dedicated equipment cleaner — remove all visible residue. Rinse thoroughly. Then apply no-rinse sanitizer. The sanitizer only works properly on physically clean surfaces.
Everything that touches the wine needs sanitizing: fermenters, airlocks, racking canes, tubing, spoons, hydrometers, funnels, and bottles. Check your airlock weekly during fermentation and replace the water if it drops below the fill line.
Sulfite additions for aging: For wines you plan to store longer than 3 months, a measured sulfite (SO₂) addition at each racking maintains protection against oxidation and microbial spoilage. The amount depends on your wine's pH — lower pH wines need less free SO₂ to achieve the same protective effect. Campden tablets are the most practical measuring method for small batches; dissolve in a splash of water before adding.
Troubleshooting & Pro Tips
In thousands of questions answered through our community, a handful of problems come up again and again. Here's a fast reference:
| Problem | Most Likely Cause | Fix |
|---|---|---|
| Stuck fermentation (SG not moving) | Low nutrients, temperature shock, high initial OG | Add staggered nutrients; return temp to 18–22 °C; pitch fresh yeast in a small starter |
| Sulfur / rotten egg smell | Nitrogen deficiency during active fermentation | Splash-rack carefully; add yeast nutrient; check temperature isn't too high |
| Persistent haze | Pectin (berry/stone fruit); yeast still in suspension | Add pectic enzyme early in primary; use fining agents (bentonite, Sparkoloid); allow more time |
| Vinegary / sharp taste | Acetobacter contamination (oxygen exposure) | Prevention only — sanitize rigorously; minimize oxygen at all transfers |
| Thin, flat flavour | Insufficient fruit weight; acid too low | Backsweeten slightly after stabilising; add small acid blend increment; taste between each |
| Browning / oxidation | Oxygen contact during transfers or aging | Siphon below the surface; keep vessels topped up; add Campden at each rack |
Stuck fermentation is the most common repair call in home winemaking. Raise the temperature slightly, add a dose of yeast nutrients (DAP + Fermaid-O is a common combination), and consider pitching a small active starter made from a fresh yeast packet. The full stuck ferment recovery guide walks through each step in detail.
Persistent haze: Give it time first — many wines that look cloudy at 4 weeks are crystal clear at 8 weeks. If it persists, try wine clarification methods before writing off the batch.
Category Overviews
Berry Wines
Berries deliver colour, aroma, and approachable acidity. Strawberry tends to ferment clean and clear with patience; blueberry benefits from a modest tannin boost and occasionally a tiny oak cube for depth. Blackberry and cranberry can run tart—adjust acid post‑fermentation if the wine feels sharp. Rack gently to preserve colour and minimise oxygen.
Citrus & Pomegranate
Orange and blood orange bring zest oils and bitterness if over‑extracted. Zest lightly and avoid pith; strain carefully. Pomegranate offers brilliant colour and high natural acidity—use a steady ferment and consider a short micro‑oxygenation via careful rackings to soften edges over time.
Stone & Orchard
Apple, pear, peach and plum reward balance. Keep oxygen at bay to preserve esters; sulphite appropriately after racking. Plum (umeshu style) is more of a liqueur‑like infusion—sweetness is part of the charm; log your sugar additions for repeatability. Peach and pear show best slightly off‑dry.
Tropical
Mango, banana and pineapple offer powerful aromatics but can challenge yeast with nutrient demands. Use staggered nutrient additions and tight temperature control. Clarification may take longer; patience plus pectic enzyme help achieve brilliant results.
Flowers & Herbs
Dandelion and hibiscus rely on careful sanitation and gentle extraction. Avoid boiling flowers; steep instead to retain delicate notes. Elderflower "champagne" is lightly sparkling—serve young and cold. Herbal additions can overwhelm; start small and scale up next batch.
Unique & Seasonal
Fun projects like watermelon, rhubarb, or blends (strawberry‑rhubarb) keep creativity high. Many of these shine when backsweetened just enough to highlight fruit. Serve well‑chilled for maximum aromatics and freshness.
Beginner Path (Your First 30 Days)
Step 1 — Gather your gear. You need: a food-grade primary fermenter (at least 1.5× your batch volume), a carboy for secondary, an airlock and bung, a hydrometer and test tube, a siphon and tubing, no-rinse sanitizer, and wine bottles with corks. The Equipment & Setup section above covers each piece and what to look for. Start with a 1-gallon kit — it's cheaper, faster to manage, and you'll lose less wine while you learn.
Step 2 — Pick an easy fruit. Strawberry and blueberry are the best starting points. They ferment predictably, clear reasonably quickly, and produce wines most people genuinely enjoy even from an early batch. Avoid tropical fruits (banana, mango, pineapple) for your first run — they're more demanding on nutrient management and temperature discipline.
Step 3 — Follow the recipe exactly, at least the first time. Measure your OG, check your pH, pitch yeast at the right temperature. Take gravity readings every 2–3 days during primary. Resist the urge to improvise on batch one — the process is the same for every fruit, and getting comfortable with it on a forgiving variety makes everything else easier. Deviations are what batch two is for.
Step 4 — Rack, stabilise, bottle. Once SG is stable over 3 days, rack off the lees, stabilise with Campden and sorbate, and bottle. Label every bottle with the fruit, the date, and the OG. Open your first bottle at 6–8 weeks and take notes; open another at 3 months. The improvement between those two tastings will teach you more about fruit wine aging than any written description can.
Common Mistakes (and Quick Fixes)
- Under-sanitising: Off-flavours — vinegary sharpness, mustiness — are nearly impossible to fully correct once they've developed. Clean and sanitize everything immediately after use. Don't let fruit must sit in equipment that hasn't been sanitized.
- Chasing ABV: Very high starting OG (above 1.110) stresses yeast and raises the risk of a stuck or incomplete fermentation. Aim for flavour and balance first. An 11–12% wine with a clean fruit character is more satisfying than a harsh 15% wine.
- Oxygen splashing during transfers: Causes browning and flat, stale aromatics. Siphon gently, submerge the racking cane outlet below the surface of the wine in the receiving vessel, and top up headspace in the carboy after every transfer.
- Skipping nutrients: Tropical, high-sugar, and low-nitrogen fruit wines are especially prone to sulfur smells and sluggish ferments when nutrients are omitted or added all at once. A staggered addition schedule makes a measurable difference.
Practical Flavour Adjustments
- Too tart: backsweeten slightly after stabilising; tiny acid reduction can help.
- Too flat: add a touch of acid blend; sometimes a cooler serving temp restores brightness.
- Lacking body: consider light tannin or a brief oak cube contact; don't overdo it.
Glossary (Fast Reference)
- OG / FG: Original Gravity / Final Gravity — hydrometer readings before and after fermentation. ABV ≈ (OG − FG) × 131.25.
- Racking: Siphoning wine off sediment into a clean vessel. Reduces autolysis risk and exposes the wine to less sediment contact over time.
- Lees: Yeast sediment that settles after fermentation. Early rackings remove gross lees; fine lees can be left a little longer for added body in some styles.
- Must: The raw mixture of fruit, water, sugar, and acid before and during primary fermentation.
- Stabilising: Adding potassium metabisulfite and potassium sorbate after fermentation to prevent renewed fermentation before and after backsweetening.
- Pectic enzyme: Breaks down pectin in fruit pulp, improving juice yield during primary and significantly speeding up clearing in secondary.
- Backsweetening: Adding sugar (or honey, or other sweetener) after fermentation and stabilisation to adjust final sweetness. Always stabilise first.
- Punching down: Pushing the cap — the layer of fruit pulp floating at the surface — back into the must during primary fermentation. Done once or twice daily to prevent mold and ensure even extraction.
- Autolysis: Off-flavors (yeasty, rubbery notes) released when yeast cells break down after dying. Prevented by timely racking off the lees, especially in warm storage.
- Free SO₂: The active portion of sulfur dioxide in wine that protects against oxidation and spoilage bacteria. Added via potassium metabisulfite (Campden tablets).
FAQs
- What's the easiest fruit wine for beginners? → Strawberry or blueberry. Both ferment cleanly, clear relatively quickly, and produce wines that are enjoyable early.
- How long should fruit wine age? → Most fruit wines are enjoyable after 3–6 months; some develop better character up to 12 months. Tannic fruits like blackberry and pomegranate reward the longest aging.
- Can I blend fruits? → Yes — strawberry–rhubarb and mixed berry blends are popular. Blend after stabilisation for the most control; test small amounts first.
- Do I need pectic enzyme? → It helps with extraction from pulp and speeds up clearing in secondary. Especially useful for berries, stone fruits, and bananas.
- Do I need to add sulfites? → For wines you'll drink within 2–3 months, a Campden tablet at stabilisation is sufficient. For wines you plan to age 6+ months, maintaining free SO₂ at approximately 25–35 ppm protects against oxidation and spoilage during storage.
Browse by Category
Berry Wines

Blueberry Wine: A DIY Guide for Delicious Summer Drinks!

Mulberry Wine Recipe: How to Make It at Home

Wine Not? Learn How To Make Your Own Cranberry Wine In Just 5 Easy Steps
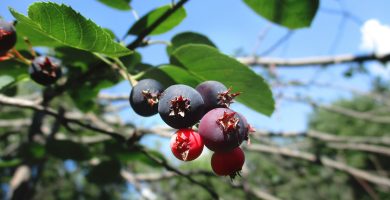
How to Impress Your Guests with a Simple Saskatoon Berry Wine Recipe

Homemade Strawberry Wine Recipe: A Step-by-Step Guide

Blackberry Wine – Fresh From the Vineyard
Citrus & Pomegranate

Pomegranate Mulled Wine: The Ultimate Guide

Wine from Pomegranate: The Ruby-red Elixir
Wine from the Orange: Exploring the World of Orange Wines

Unleash the Flavor: Blood Orange Wine with Grape Starter Recipe
Stone & Orchard

The Ultimate Guide to Making Crabapple Wine at Home

Making Zinfandel Wine: Recipe and Cooking Ideas You Will Love!

From Vine to Bottle: The Fascinating Process of Making Wine From Concord Grapes

Japanese Plum Wine Recipe: How to Make It at Home
Peach Wine Recipe: How to Make Delicious Homemade Wine

Gooseberry Wine Recipe: How to Make It at Home

Pineapple Wine Recipe: Easy Homemade Guide (5 Gallon)

Apple Wine Recipe: Step-by-Step from Fresh Apples
Tropical
Banana Wine: The Tropical Beverage Revolutionizing the Wine World

Unlock the Secret to the Perfect Honeydew Wine with this Recipe

How to Make Sapodilla Wine: A Comprehensive Guide for Winemaking Enthusiasts

Mango Wine: A Deliciously Sweet and Fruity Homemade Wine Recipe
Kiwi Wine Recipe: Easy Step-by-Step Guide for Beginners
Watermelon Wine – The Exotic Taste
Pineapple Wine Recipe: Easy Homemade Guide (5 Gallon)
Flowers & Herbs
Hibiscus Wine Recipe (Roselle/Sorrel) — Deep Red, Bright & Floral

The Ultimate Sunflower Wine Recipe with Petals: A Delightful Floral Elixir
Elderflower Champagne: A Refreshing Summer Beverage

Dandelion Wine: A Step-by-Step Guide to Making Your Own Delicious Dandelion Wine at Home
Unique & Seasonal

Rhubarb Wine Recipe: Complete Guide (1 & 5 Gallon)

Strawberry Rhubarb Wine: A Review

Dragon Blood Wine

Frankenberry Wine Recipe
Start with the recipe that fits your fruit and season. If technique questions come up along the way, the Fermentation Management and Troubleshooting sections above cover the scenarios that come up most often. For anything more specific, the common winemaking problems guide goes deeper.