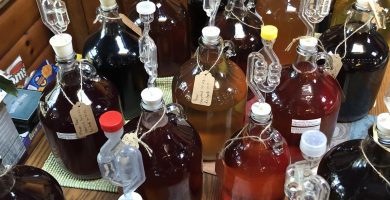
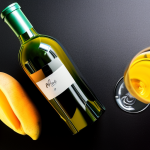
If you've ever wondered about how to make wine at home, here we explain everything. Making wine is not actually a difficult or impossible task. In fact, many people in the world have tried to make their own wine using grapes, fruits from their region, flowers, and even juice or concentrates.
All you need to make good wine at home is a basic set of utensils, or tools, patience, and lots of creativity. Sometimes what you need is an idea and some good advice from someone who can guide you as a beginner.
Why Make Wine at Home?
Homebrewing wine requires some basic knowledge of chemistry, equipment, and instrument handling. But don't worry, we will teach you each item step by step.
Do you want to start reading a complete manual or DIY wine book to guide you into the wonderful adventure of making wine? Get the Complete Guide to Make Wine today and learn how to make homemade wine.

This guide explains the typical question: how can you make wine at home?
How long does it take to make your own wine?
This is a common question among those just starting to making wine at home. In general, the duration of a batch of wine ranges from 4 to 8 weeks to complete the process.
However, this will depend on other factors such as the quality of the yeast you are using, the concentration of sugars at the beginning of fermentation, and even room temperature.
The fastest way to make wine is to ferment a fruit macerate with baking yeast and adjusting the sugar level of the must, leave it in anaerobic fermentation for about 8 to 12 days, clarifying later.
Do I need a kit to make wine?
The answer to this question is no! All the implements to make wine can already be had at home or purchased at a very low cost. It is not mandatory to have a kit. However, some people prefer to buy one to ensure they have all the necessary supplies. We will recommend later how to buy a good kit. You can read too some guidelines on this page about how to make your own wine using a kit.
Home Wine Making Process
Welcome to the adventure of making wine from scratch. The wine making process consists of 9 steps. On this page, you will learn all you need to know!
Step 1: Supplies and Ingredients
The fruit or juice

The first thing you must ensure to make good wine is naturally a fruit. Winemakers specify that the wines are made exclusively from grapes. Other fruit ferments are commonly called "wine aperitifs".
However, for this site, any fruit ferment from juice, fruit concentrate, or even flowers will be considered as wine.
When using juices making homemade wine, check the label's information carefully to ensure that they do not have sorbates, since these interfere with fermentation. The presence of vitamin C does not affect.
Fruit Wine Recipes You’ll Love

Hibiscus Wine Recipe (Roselle/Sorrel) — Deep Red, Bright & Floral
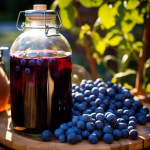
Blueberry Wine: A DIY Guide for Delicious Summer Drinks!

Homemade Strawberry Wine Recipe: A Step-by-Step Guide
Mango Wine: A Deliciously Sweet and Fruity Homemade Wine Recipe

Dandelion Wine: A Step-by-Step Guide to Making Your Own Delicious Dandelion Wine at Home
Types of sugar

Sugar is essential for the production of wine since the yeasts transform it into alcohol. Use these types of sugars:
- White sugar: This is the most common type of sugar to use. It is inexpensive and does not alter the taste or color of the wine. Sucrose ferments quickly and is generally metabolized quickly by yeasts.
- Brown sugar: This type of sugar is useful for winemaking. However, in light wines, it interferes with the color and makes it look dark. I recommend it with intense red fruits.
- Dextrose: Also known as Corn Sugar, it is an additive that can be found in health stores for about $ 1 a pound.
- Honey: This is an option, but it is not the most recommended. Normally fermentations with honey are slower than those with sugar.
Wine Yeast

Yeast is the most relevant ingredient in the winemaking process and responsible for wine production. The recommended brands are Lalvin and Red Star. You can purchase them at low prices. See a review of each in our yeast catalog.
However, if you can't buy one of these brands, you can use baking yeast. These yeasts could generate slight alterations in the taste and color of the wine.
The typical yield of a yeast packet is a production of up to 5 gallons per batch, although due to genetic factors of the strains, they could have more per package.
Wine Chemicals
Before using any of these supplies you should check if you are allergic to any of them. This is rare, but it is best to be sure or consult an expert.
These wine-making supplies can be found at a chemical store or brewing shop:
- Sodium or Potassium Metabisulfite: This additive reacts or "sequesters" oxygen to prevent the yeast from producing vinegar (acetic acid). In the absence of oxygen, yeast produces alcohol. The additive is a white powder with a pungent odor, and its dose in wine is extremely low.
- Potassium Sorbate: This additive is a yeast growth inhibitor and stop fermentation or to add sugar to the wine without reactivating the yeast.
- Yeast Nutrient: Apart from sugar, fruit mix usually contributes a few essential nutrients to yeast. That is why it is necessary in some cases to add a powder mixture of nutrients that help accelerate growth and prevent undesirable flavors.
Step 2: Equipment
Fermenter or container
This is a container or jug made of plastic or glass. Use containers with a narrow neck, such as those used for water storage, and check whether they are type 1 or 2, ie PET / PETE or HDPE. Other plastics deteriorate quickly and allow oxygen to enter the fermentation.
Rubber plug

I recommend the # 8-9 rubber plug (rubber stoppers). However, do a fit test before purchasing. Only necessary if you are using the commercial airlock or tube. I recommend poking a 1/4 hole in it.
Airlock

- Balloon: the CO2 released by fermentation will inflate it gradually. This creates a pressurized atmosphere that prevents oxygen from entering while carbon dioxide diffuses out of the balloon.
- Commercial airlock: it is a piece made of plastic that allows the escape of carbon dioxide in a siphon with water. It is an inexpensive and easily acquired piece.
Stirrer
This is an implement that helps to mix the wine during fermentation. It is a long margo with a paddle or impeller to homogenize the mixture of solids and liquids. Avoid using wood.
💡 If you want to make a stirrer at home, you can make one with a plastic rod or a PVC tube to which a plastic spoon is attached at one end.
Turkey Baster
A Turkey Baster allows you to sample the wine after fermentation is over to check its color, taste, or even evaluate other parameters.

The basters are made of glass, plastic, or metal, which will generate differences in their price or application. You can start with a plastic one so that you become familiar with its use.
The siphon
A siphon is a flexible vinyl tube 20 to 50 cm long. It serves to extract the liquid from the container when the solids have settled, to recover the clarified wine. These vinyl hoses can be purchased at a homebrew store near your home.
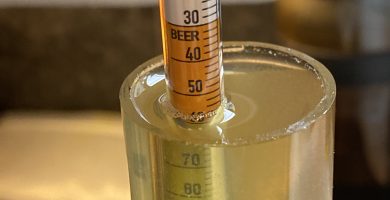
Hydrometer
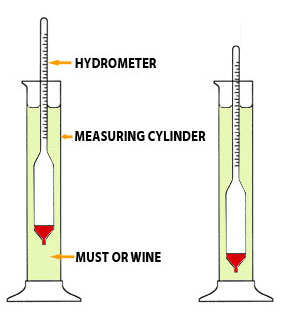
A hydrometer is a floating device that measures the Specific Gravity (SG) of any liquid. In winemaking, it gives you a guide to determine the Alcohol by Volume (ABV). You require a test jar and fill it with the wine, and carefully read the level.
When sugar is transformed into alcohol, the SG reduces its value, and the gravity will fall. The daily change is 10 points.
Home Winemaking Equipment Guides

Removing Wine Labels: A Step-by-Step Guide
How to Clean a Carboy in 5 simple steps

How to Select a Cork For Wine Bottles
Step 3: Sanitization
It is not necessary to sterilize the equipment before making wine. In contrast, at this stage, you have to minimize the presence of bacteria or some native yeasts of the fruit that can generate unpleasant flavors.
Avoid using bleach, as it leaves residues that react with organic matter, generating toxic compounds called organochlorines. Wash the containers and instruments with a detergent solution, leaving contact of at least 30 seconds.
Iodide sanitizing solutions are recommended too. These are non-toxic food grade and can be purchased at a homebrew store or on amazon.
Finally, wash your hands well before handling fruit or containers for the fermentation of wine.
Step 4: Fruit processing and start up

You can choose any fruit for winemaking. Check the fruit doesn't have particles of dirt or grit. Wash the fruit with abundant water before handling them. Preserve the fruit skin in the whole process since it provides flavors, colors, and a good taste.
Crush the fruit using a clean potato masher, a blender, or your hands; crush and squeeze the fruit to release its juices. If the juice is not abundant, you can add some (hot) water and mash the fruit.
When making wine from grapes, we recommend removing the seeds, or avoid the stress on them since high amounts of tannins are released. Therefore, it increases the bitterness of the wine.
If you are using a juice box, skip this step! Your fruit is ready for fermentation. However, check the label again since the presence of sorbates is undesirable.
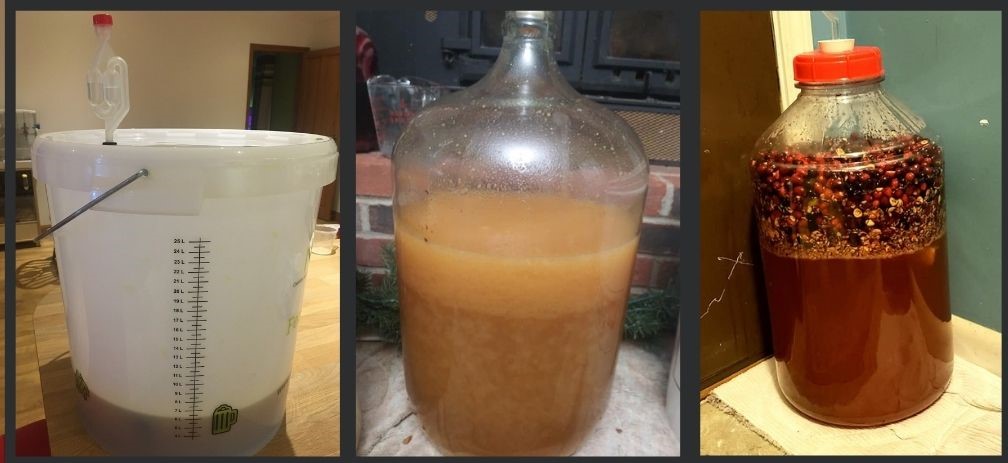
Step 5: Primary Fermentation
Pour the juice and the fruit pulp into the fermenter vessel and add some sugar, mixing vigorously. Then, check the temperature. It should be between 18°C to 24°C.
Grab a sample of the liquid and transfer it to a test jar to measure the SG with your hydrometer to read the numbers on the lines right at the level of the liquid. The gravity should read between 1.070 - 1.090 depending on the type of wine (write or record this measure to evaluate the progress of the fermentation).
💡 You can add now some powder additives such as elderflowers, oak if you want.
Open your package of yeast and sprinkle it onto the surface of the liquid. Alternatively, you can stir the mixture. From now this liquid is called "the must".
💡 Bentonite is a mineral used to clarify wine. However, adding bentonite at the beginning of the fermentation helps make the fermentation more homogeneous and simultaneously helps the clarification process when the fermentation ends. The CO2 bubbles rise the yeast and bentonite, and due to its density, it sediments again capturing charged molecules. You can try 1 tsp / 5 gallons.
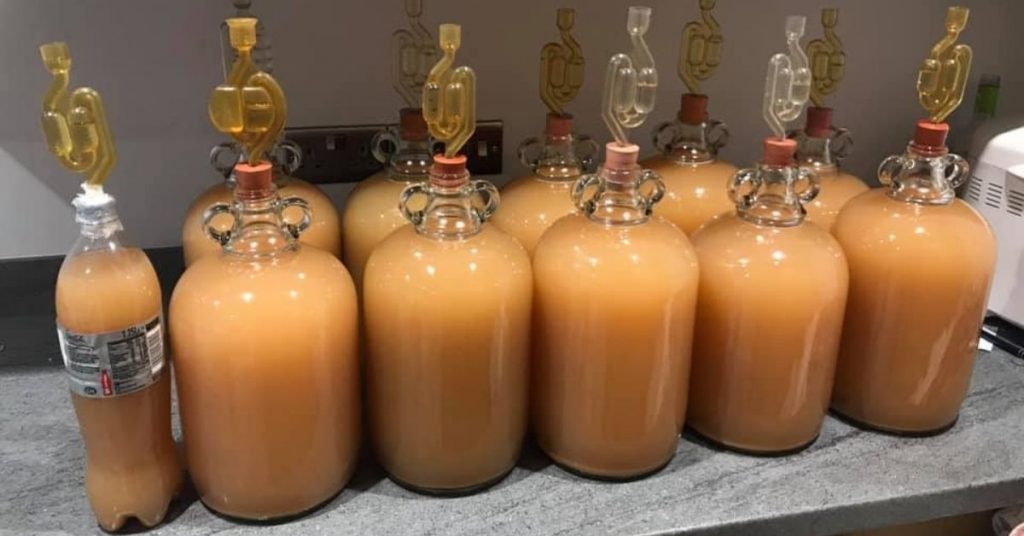
Finally, close the fermenter and install the airlock. Remember to fill the siphon with clean water to avoid the entering of air into the fermentation.
The signals of fermentations are presented between 24 to 48 hours. You will detect bubbles of carbon dioxide. Once a day you can grab a sample of the must and check the specific gravity. Record your results.
Step 6: Secondary Fermentation

After 5 to 7 days the primary fermentation finishes. Check the specific gravity again. It must be 1.010 or less to ensure the production of alcohol. If not, wait a couple of days for the fermentation to stop properly.
When the wine has stopped fermenting (it has stopped bubbling) it has to be racked. Transfer your fermented wine to a carboy by using a siphon (or an auto-siphon). Avoid transferring solid sediment by maintaining the vinyl tube up from the bottom of the fermenter.
Then, attach the airlock to the carboy using a rubber plug. Put some clean water into the airlock again. Leave the secondary fermentation by 10 days. During this time, some lactic bacterias transform organic acids and sugars into lactic acid, improving the wine taste.
Fermentation Guides
(Coming soon)
Step 7: Stabilising and Clearing
At this point, the wine is almost finished fermenting. Check the smell, if it is some sharp, do not worry. Now it's time to calculate the alcohol content as follows:
Alcohol (%) = (Initial Specific Gravity - Final Specific Gravity) * 131
For example: if initial SG was 1.091 and the final SG was 0.995, then your alcohol content in volume is: (1.091-0.995)*131 = 12.4%.
Wine stabilization
As stabilizers, it is common to use potassium metabisulphite and potassium sorbate. Dissolve a pack of each of them in half glass of water, then add it to the wine and mix for 2 min.
The last step of the stabilization process is adding the finings. We recommend solid chitin. Add the pack directly to the wine and mix vigorously. This fact mixes the chitin and degasses the wine.
Clearing
Wait for a couple of weeks for the wine to clear maintaining the airlock installed in the carboy cap. Be patient!
Grab a sample of the clarified wine and check if its color is bright and clear. You can use a window or a flashlight. In case you detect some tiny particles dispersed in the wine, just let stand it for more days.
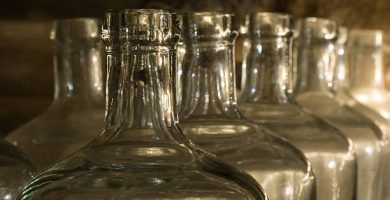
Step 8: Bottling

If you make a carboy of wine, you will need about 30 bottles and 30 corks to bottle it all. You can recycle the bottles you've already used, but you should wash them carefully with detergent before using them again.
New bottles should also be washed with detergent and subsequently with a dilute sodium metabisulfite solution. Finally, rinse with plenty of water and allow to dry by gravity by inverting the bottle and alternately placing it on a bottle base known as "draining tree".
You can place the cork manually, being careful not to break the neck of the bottle, or you can use a floor corker.
Make sure the gap between the liquid level of the wine inside the bottle and the cork is at least two fingers. The air contained within the bottle will oxidize the wine, and if you fill a lot of wine inside the bottle, the cork could be popping back out.
Finally, leave the bottles upright for 3 days before laying them on their sides for aging. This allows the cork to seal completely. And maintain in a dark and cool place.
Step 9: Final recommendations

You can put nice labels and capsules on your wine bottle to improve the look. In the case of capsules, a hairdryer or a steal from a kettle could serve as a source of heat for sealing it.
And that's all! You are basically a winemaker. Wait 6 months on average for the wine to improves the taste. Enjoy it in moderation.
What is your ideal homemade wine?
There are countless recipes for making wine. Normally, you do not know which fruit to choose that best meets your needs. At Makewinelab.com we have classified them so that you can find what you are looking for.

Apple Wine Recipe: Step-by-Step from Fresh Apples

Blackberry Wine – Fresh From the Vineyard

Pineapple Wine Recipe: Easy Homemade Guide (5 Gallon)

Frankenberry Wine Recipe

Gooseberry Wine Recipe: How to Make It at Home

Dragon Blood Wine
Guides for you to become an expert making wine
How do you make wine as a professional? The following guides are useful and easy to read for you.